Tampilkan postingan dengan label gimp. Tampilkan semua postingan

Selasa, 10 Mei 2011

How to Easily Create a Fire Effect

In this post I am going to about how to make a fire effect with the GIMP.

Well, just following the steps.

1. Open your GIMP application and create a new file. Here I use a size 420 x 200 pixe. As the BG-Color choose black and white text to write a new layer (bold text, color white, size: 100)


2. Right-click the text-layer in layers dialogue and select "merge down". You should only have one single layer now. Should You only have one single layer now. You just have to have one single layer now.

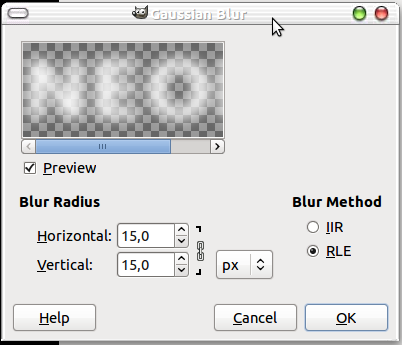
3. Use the Smear-Tooluntuk make fire


4. Make some upward movement with smear-Tool.

5. Once considered to clarify the effects of live fire.
 
Click Colors>> Color Balance
 
Then set the configuration as below

a. Shadows


b.Midtones


c. Highlights


6. The end result is as follows.

How to upgrade GIMP 2.7

GIMP is an acronym for GNU Image Manipulation Program, a free program distributed for use in repairing or mengotakatik photos, creating and composing images.GIMP can be used as an alternative to Photoshop and can run on Windows, Linux and Mac.

Now the GIMP Version 2.7.1 has launched all at once is a forerunner to a new generation of GIMP 2.8 which brings many updates.  GIMP 2.7.1 released late June 2010, are now shown with a single window as one of the major GUI improvements from developers in increasing concentrations GUI interface. Improvements are quite striking is the support for the Group Layer Layer that enables grouping related to one another to make it more manageable, especially on large projects. Overall it was an attempt by developers to make GIMP more user friendly and easy to use, especially for the graphics processing using banyka layer (layer).


 But keep in mind that this release is not yet stable and please read the GIMP 2.7 release notes . Complete list of changes made ​​can be found in the NEWS , please read themselves. The source code can be downloaded directly from ftp.gimp.org .


 If you want to upgrade, open a terminal and type the following

sudo apt-add-ppa repository: matthaeus123/mrw-gimp-svn

sudo apt-get update

sudo apt-get dist-upgrade

sudo apt-get install gimp


Here is the view from the GIMP 2.7


The easy way to neon effect with the gimp

In designing sometimes we create light effects. one of which is a neon effect. Then how do I create these effects? Especially with software GIMP is hard for some people to use it. At this time will I share how to create neon effects on text with GIMP.


1. Create a new file with black backround


2. Click Filter> Blur Gaussian blur: 15px


3. After that click Colors>> Curves and then set as below


4. Last Click Filter>> Alpha to Logo> Neon and enter valuenya like this: Effect size: 40
Background color: black
Glow color: whatever you like


5.The end result is as follows;


Simple enough right? Hopefully useful ... ^_^ ^ _ ^

 
Design by Free WordPress Themes | Bloggerized by Lasantha - Premium Blogger Themes | Blogger Templates